Various techniques and a selection of compounds and polishes are used with advanced dual-action and rotary polishers that add a desired level of depth and shine needed for achieving a desirable finish.
For anyone wishing to improve upon the existing paintwork of their vehicle, it is advised to ensure the surface is clean and that any embedded contaminants have been having removed with the use of a clay bar.
Ideally, work in a shaded area away from direct sunlight. At this point for anyone who is new to paint correction should first attempt the correction with a dual-action polisher, avoid a rotary polisher!
The learning curve for a rotary polisher can be on average be a couple of years versus several months for a dual-action polisher. The benefit of a dual-action polisher is that they are far less likely to burn paint, particularly the types that aren’t forced rotational. A rotary polisher which spins on a single axis and can create a lot more heat, quickly!
Patience is needed in controlling the amount of friction required in achieving the desired result and is something best learned on something other than your rare classic.
It’s always best to begin a test area of approximately one square foot while using the least aggressive method first. You can only correct what you can see so it’s best to set up a light or carry a pen torch. Other things to consider are the speed of the machine, amount of pressure applied, pad and compound selection ie: a soft, medium or heavy cut, condition or the quality of the paintwork, and atmospheric temperature.
Begin with priming (or seasoning) your pad with your selection of compound, if using a microfibre pad use your fingers to rub the compound into the pad followed by applying 5-6 pea-sized drops, however, if your using a foam pad priming is not necessary.
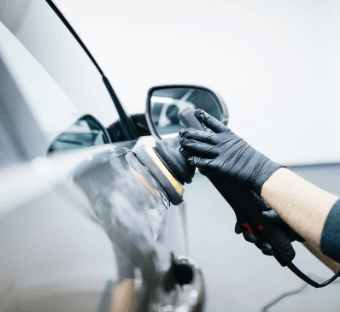
Using a medium amount of pressure begin passing over the panel with the machine speed set between slow to medium in a north to south direction, followed by an east to west direction, moving at about an inch per second while over-lapping the previous pass by 50 per cent. After approximately one or two minutes wipe and inspect the panel before making a decision on whether to change pad, compound or both. It’s good practice to frequently blow out the pad with compressed air or use a pad cleaning brush to avoid causing piggy tails (fine looped scratches caused by grit in a pad or when pad fibres become dreadlocked).
It’s important to keep the pad flat on the panel and remember that painted plastic (or carbon fibre) surfaces like bumper bars will heat quicker than metal surfaces. Stop intermittently to rest a hand on the vehicle to check that the panel isn’t getting too hot and avoid edges along the side of panels where the paint can be thin. The use of masking tape can help with this.
Once deep scratches have been removed ‘work your way out’ by using a finer grade compound on a soft finishing pad to slowly jewel the paintwork to a crisp mirror-like finish.
Advanced Detail specialises in paintwork correction and ceramic coatings and is located southeast of Melbourne within the Bayside area.
0 Comments